Set Up a Service Status Page for Free with Cachet
Jun 5, 2016
Any tech company that provides its goods and services over the Internet, whether it be in the form of a dashboard interface or feature-rich API, needs to prepare for the inevitable and unexpected hiccups that plague service uptime.
Service Degradation
It manifests itself in various forms, ranging from increased API response times, elevated API error rates, DNS provider outages, datacenter blackouts, database lockups, DDoS attacks, and so on.
An organization can only do so much to avoid service degradation, but sometimes, life just gets in the way. Whether it be a new employee that somehow managed to push untested code to the main production boxes, or even worse, forgetting to renew HTTPS certificates, these things just happen sometimes.
Transparency
The best way for organizations to handle these kinds of situations is with complete transparency. This can easily be achieved by setting up a status page that reflects your service's operational status. You can set up this status page to display uptime metric graphs, any recent incidents, what is being done to resolve them, and an incident history.
There are several paid status page solutions available, but if your budget is tight, luckily, there's Cachet.
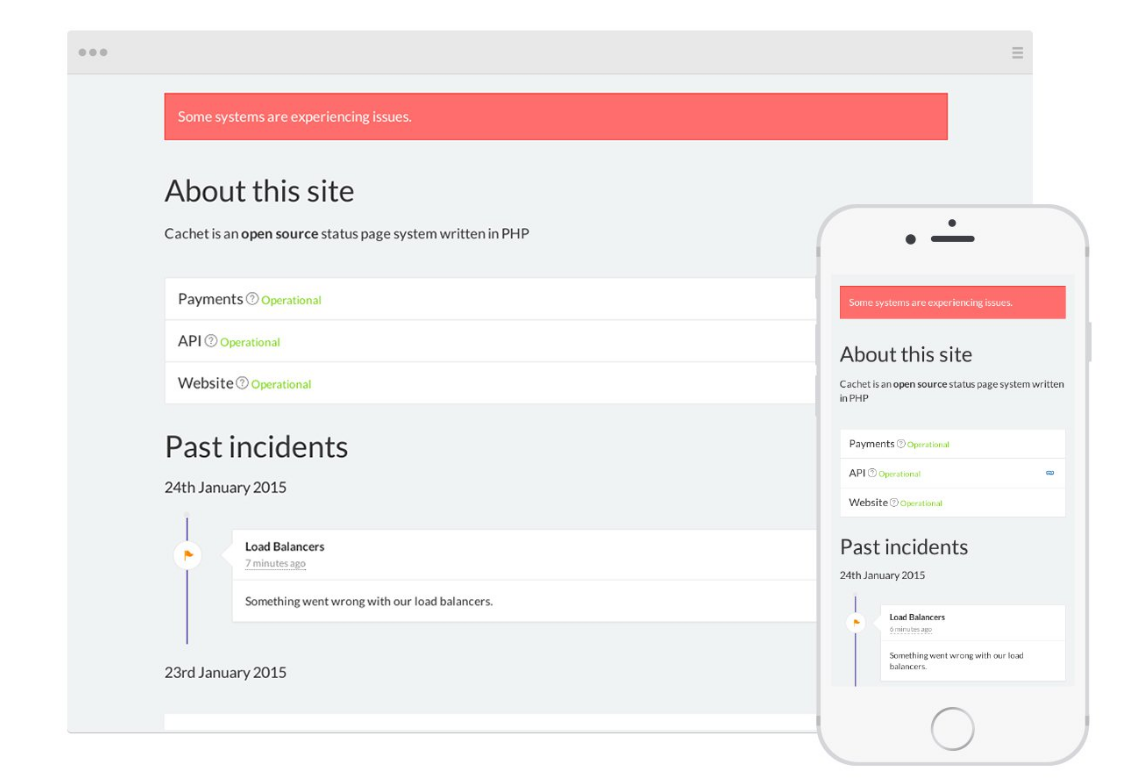
Cachet is a beautiful and powerful open source status page system, a free replacement to services such as StatusPage.io, Status.io and others.
Cachet is indeed free and open-source, and one of the greatest things about it is that it's easy to customize its theme to fit your branding.
Here's a demo of Cachet.
The only downside of Cachet is that its installation docs are very lacking. I had to waste nearly 4 hours trying to get it to install successfully. But no matter, I've managed to nail down the perfect installation steps necessary to get it up and running in no time!
Setting Things Up
Let's begin by spinning up a new Ubuntu 14.04 LTS instance. Choose whichever cloud provider you like most, but do consider its reliability history as this status page should be an always-up, go-to place for when your service goes down.
A good idea is to host this instance in a completely different region than the one with all of your production instances, so that in case an entire availability zone or region goes down, the status page shall prevail.
Instance Configuration
As for the instance compute power, you can definitely cut costs here -- I'd even suggest going with a t2.nano if you're using AWS, it costs about $4.50 a month.
Make sure to assign a public IP to the server, as well as allow access on port 80 to all IPs, and on 22 to your IP address.
Finally, set up an A Record in your domain's DNS record management interface so that status.you.com will point to the server you just created.
Install Dependencies
First things first, update the package cache:
sudo apt-get updateLet's install some basic requirements for Cachet, including Apache2 and PHP:
sudo apt-get install git curl apache2 php5 libapache2-mod-php5 php5-gd php5-apcu php5-mcrypt php5-sqlite php5-cliNext, install Composer, a dependency manager for PHP:
curl -sS https://getcomposer.org/installer | sudo php -- --install-dir=/usr/local/bin --filename=composer
Finally, enable Apache's mod_rewrite as it's required for Cachet to work:
sudo a2enmod rewriteInstall Cachet
Head over to the ubuntu user's home directory:
cd ~Let's clone Cachet to the server. At the time of writing, the latest stable version of Cachet is v2.2.2.
Check for the latest stable version of Cachet in the official releases page and in case there's a newer version number, plug it into the following command (instead of v2.2.2):
git clone https://github.com/cachethq/Cachet.git
cd Cachet
git checkout v2.2.2
There is actually a dependency reference error in v2.2.2 that Cachet project maintainers have not yet fixed in the stable branch. So let's manually fix it by running the following command:
sed -i 's/use Illuminate\\Support\\Facades\\Str;/use Illuminate\\Support\\Str;/g' app/Http/Controllers/Dashboard/SettingsController.phpInstall PHP Dependencies
Install all of the Composer depenencies:
composer install --no-dev -oConfigure Cachet
Create an .env file with the following contents to have Cachet write to a local SQLite database, which is fast and easiest to configure:
nano .envPaste the following contents inside:
APP_ENV=production
APP_DEBUG=false
APP_URL=http://status.you.com
APP_KEY=

DB_DRIVER=sqlite

CACHE_DRIVER=file
SESSION_DRIVER=file
QUEUE_DRIVER=sync
CACHET_EMOJI=false

MAIL_DRIVER=smtp
MAIL_HOST=null
MAIL_PORT=null
MAIL_USERNAME=null
MAIL_PASSWORD=null
MAIL_ADDRESS=null
MAIL_NAME=null
MAIL_ENCRYPTION=tls

REDIS_HOST=null
REDIS_DATABASE=null
REDIS_PORT=null

GITHUB_TOKEN=null
Note: Make sure to replace status.you.com with the DNS hostname you set up earlier.
Run the following commands to prepare for the installation:
php artisan key:generate
php artisan config:clear
touch ./database/database.sqlite
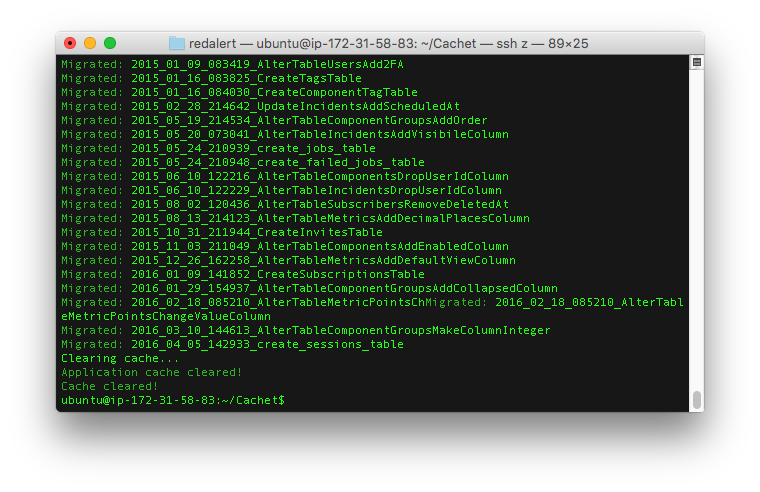
chmod -R 777 .env storage database bootstrap/cacheFinally, run the following command to install Cachet:
php artisan app:installIf all goes well, great!
If not, check Cachet/storage/logs/laravel-YYYY-MM-DD.log for the stack trace. It's most likely a permission issue.
Now all that's left is to set up Apache to serve Cachet's public/ folder.
Configure Apache
Run the following commands to link /var/www/html to Cachet's public/ directory:
sudo mv /var/www/html /var/www/html-old
sudo ln -s /home/ubuntu/Cachet/public /var/www/html
Let's permit .htaccess directives by editing the Apache2 configuration:
sudo nano /etc/apache2/sites-available/000-default.confFind:
DocumentRoot /var/www/htmlAdd below:
<Directory /var/www/html>
        Options Indexes FollowSymLinks
        AllowOverride All
        Require all granted
</Directory>
Finally, restart Apache2 for changes to take effect:
sudo service apache2 restartSetup Wizard
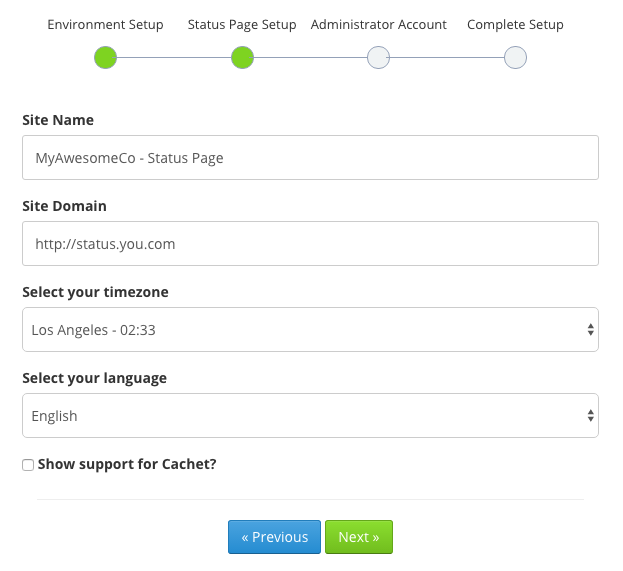
Open a web browser and head over to your status page hostname. You should see the following setup screen:

Leave the default cache/session drivers as-is and click Next.
On the next page, you'll be asked to enter some details about the status page, such as its name, URL, time zone, language, etc.
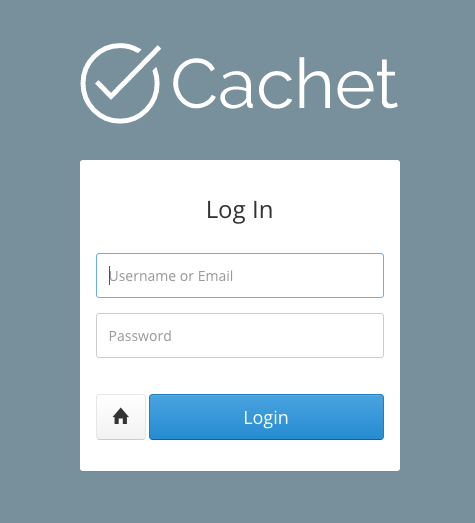
On the third setup page, you'll be asked to set up an administrator account for managing the status page.
When you're done filling everything in, click Go to dashboard. You'll then be presented with this marvelous login screen:
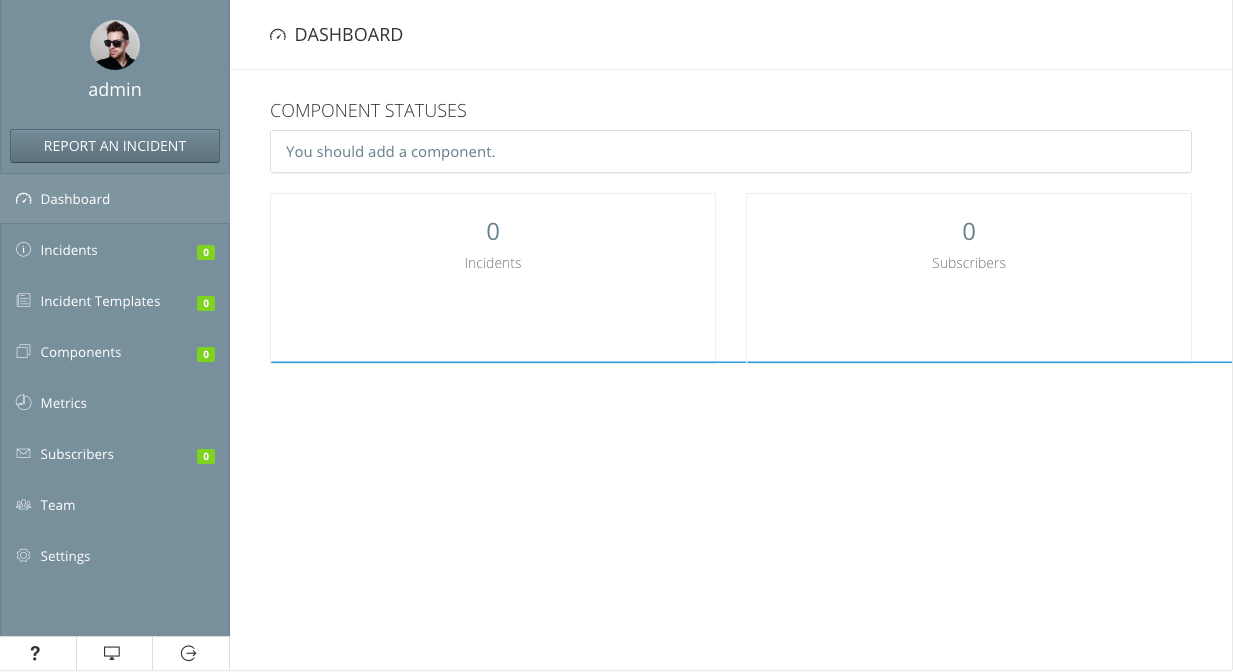
Within the dashboard, you'll be able to add service components (e.g. API / DB / Website / etc), incidents, metrics (graphs), and much more.
To set up HTTPS for your status page, follow this awesome tutorial by DigitalOcean to set up Apache with a free Let's Encrypt certificate.
If you want your customers to be able to subscribe to e-mail alerts, check out the Cachet e-mail setup docs.
Well done, you've successfully set up a status page for your service! Now, it's up to you to set up mechanisms to automatically update this status page with new incidents or updated metric data, using the Cachet API.