Host Your Own Private GitHub with Gogs.io
Mar 24, 2016
GitHub is an amazing platform. It has completely revolutionized the way developers work together on software and has inspired countless individuals and organizations to open-source their code for a more transparent, collaborative development world. It encourages developers to work according to best practices and renowned coding styles, making it easier for people to work together on projects, and boosting overall developer proficiency.
I adore GitHub. Every time I start working on a personal project in my own free time, I can't wait for the exciting moment when I finally share it with the world by typing git push origin master, hoping that someone stumbles upon it someday. That's usually not the case though, as most of my projects go unnoticed due to the vast number of GitHub repositories. But hopefully, when someone Googles a specific need that I have managed to answer with one of my projects, they'll be able to find it and complain about something not working as it should. =)
Private Repositories
What about projects that you are not yet ready to share with the world? Maybe your code isn't perfect yet, or maybe it contains sensitive database credentials or secret API keys that you definitely don't want out there in the open? Maybe you're behind a corporate firewall and can't host your code on cloud services like GitHub? Or maybe you think you built a project that won't benefit anyone else, ever? Maybe, just maybe, you don't want to host your sensitive private repositories on a shared cloud with other people's code, having it sit there, waiting until someone finds a way in, as this talented gentleman did?
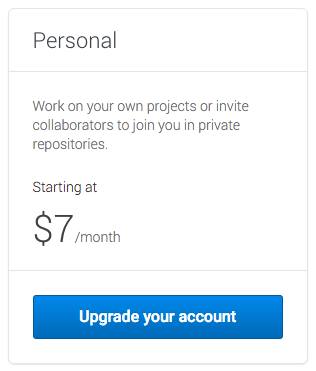
GitHub's private repository plan for individuals starts at $7/month. I think that's a bit expensive -- people working on their personal pet projects should be able to create a few private repositories for free. A $7/month fee can get expensive if you plan to have your projects hosted privately on GitHub for years to come. And this doesn't change the fact that your code is sitting in a shared cloud, targeted by many skilled individuals.
How about hosting the repositories on your own servers? There are several host-it-yourself git services, but some of them are extremely complicated to set up, requiring you to sift through slow and complicated installation steps that don't always go as planned, others are quite ugly, and some are simply limited. Luckily, I found Gogs, and it is the easiest of them all to setup and feature-rich, delivering the closest experience to GitHub than any other self-hosted git service!
Meet Gogs
Gogs lets you host your own private GitHub on your own servers. Literally. It's a very detailed clone of GitHub, both in design and features. It's built in Go and works really, really fast! Check out the live demo here. The fact that it's a GitHub clone makes it really easy to use if you're already used to GitHub's clean interface.

Let's go ahead and set up Gogs on a freshly-spun Ubuntu 14.04 EC2 instance on Amazon Web Services! You can also perform these steps on any other cloud provider, if you're not into AWS for some weird reason that is beyond me.
Launch an Instance
Let's spin-up a new EC2 instance by heading over to the EC2 launch wizard on AWS. Make sure to select Ubuntu Server 14.04 LTS (HVM), as the following installation guide is tailored to debian-based distros, specifically Ubuntu.

If you intend to be the only one accessing Gogs, Amazon's new t2.nano instance class will definitely suffice. I'd recommend assigning an Elastic IP to your instance and exposing ports 22 (preferably only to your IP) and an additional port that Gogs will listen on, port number 1337, because we're cool. =)
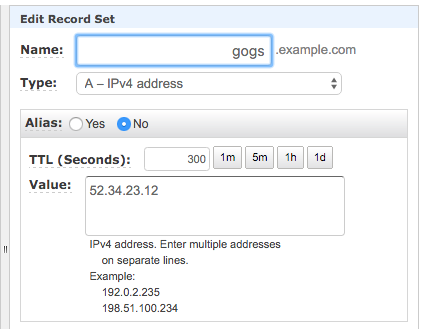
If you happen to own a domain name, I'd highly recommend creating an A Record at your DNS provider and pointing it at the EC2 server's Elastic IP so that you'll be able to access Gogs via a human-friendly URL, e.g. http://gogs.example.com:1337. This is a requirement if you wish to use Gogs over HTTPS.
Go ahead and grab a cup of coffee while your instance is spinning up.

Install Dependencies
SSH into the instance and run the following command to update your repository cache and install some basic dependencies for Gogs:
sudo apt-get update
sudo apt-get install -y wget unzip git
Let's go ahead and create a new user called git that will run Gogs and have full ownership over its files:
sudo useradd --system --create-home gitThis will create a system user for Gogs and a home directory in /home/git.
Switch the shell over to the git user and head over to its home directory:
sudo su git
cd ~
Download Gogs
Grab the latest Gogs version as a .zip archive from here -- you'll probably need the amd64 archive since your instance is 64-bit (check with uname -a, look for x86_64).
At the time of writing, the latest version is v0.9.13. Let's grab it by using wget:
wget https://dl.gogs.io/gogs_v0.9.13_linux_amd64.zip
unzip gogs*.zip
rm -rf gogs*.zip
This will download and unzip Gogs for you into the /home/git/gogs folder.
Run the Binary
Gogs is extremely easy to run -- the archive includes a binary called gogs that you can invoke directly to run the service, specifying the port as an argument:
cd gogs
./gogs web --port=1337
Look for the Listen: http://0.0.0.0:1337 log message to verify that everything is working as expected. If so, go ahead and browse to the hostname pointing to your EC2 server, e.g. http://gogs.example.com:1337.
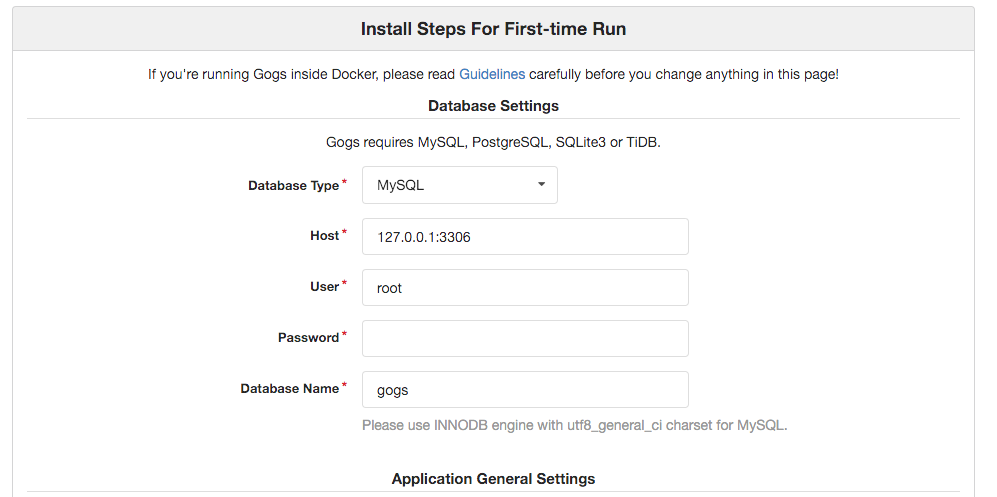
You should be able to see the following installation screen:
If not, you try accessing your server via its Elastic IP, e.g. http://53.22.213.34:1337, and if that still doesn't work, you most likely didn't configure your EC2 security group correctly. Make sure any IP address can access port 1337 in the EC2 server's security group.
Configure Gogs
Make sure to select SQLite3 as the database type, as it requires no configuration at all. The rest of the configuration is up to you, go crazy!

Be sure to update the Domain and Application URL in the Application General Settings section to point to your subdomain or Elastic IP address. Be sure to use https:// as the protocol if you wish to set up HTTPS to access Gogs.
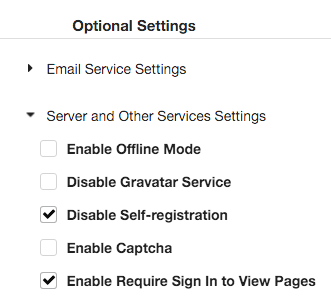
This one's important: Make sure to tick Disable Self-registration and Enable Require Sign In to View Pages in the Optional Settings section so Gogs operates in private mode.
Also, set up an account for yourself under Admin Account Settings.
Go ahead and click Install Gogs when you're done. You'll now be presented with a friendly message and a sign-in screen.
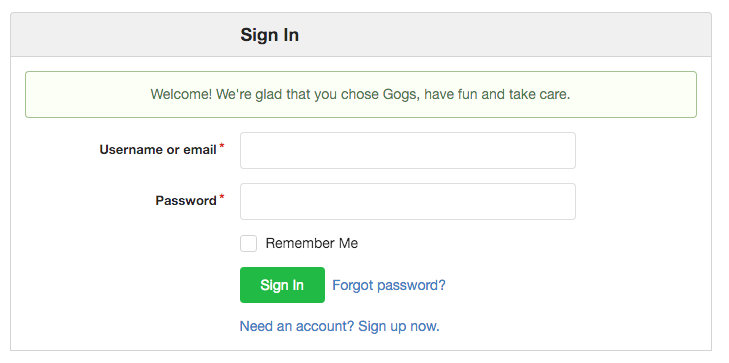
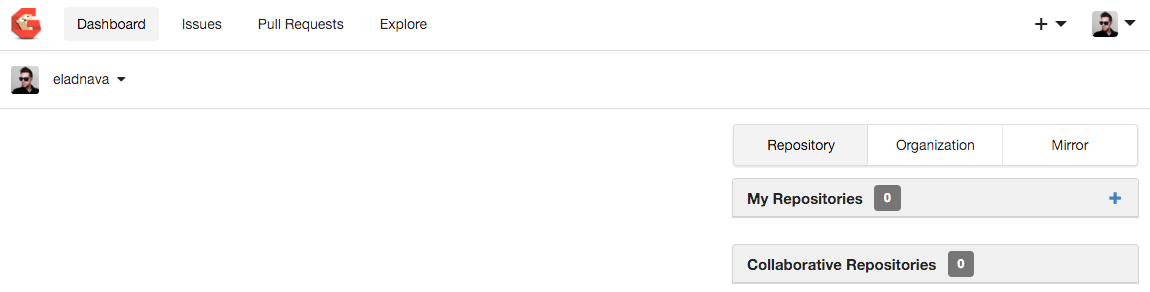
After signing in, you'll be able to create repositories, clone, push, and whatever else your heart desires.
That's all, folks!
Just kidding! What about HTTPS encryption? How about setting up a daemon to make sure it runs forever, even if the server reboots? Let's get to it!
Set Up the Gogs Daemon
Gogs provides a daemon script that we can use to have the system automatically run Gogs for us when it boots.
Kill the running Gogs instance, log out of the git user's shell and back into ubuntu, and then run the following commands to download the Gogs init.d script and make it executable:
cd /etc/init.d
sudo wget https://raw.githubusercontent.com/gogits/gogs/master/scripts/init/debian/gogs
sudo chmod +x gogs
Now all we need to do is edit the init script to add our port to the gogs binary argument string. Using sed we can automatically find and replace within the gogs daemon file without opening it, using the following command:
sudo sed -i -e 's/DAEMON_ARGS="web"/DAEMON_ARGS="web --port 1337"/g' gogsLet's try running the service now:
sudo service gogs startIf all is well, you should be able to browse to your Gogs instance at http://gogs.example.com:1337.
Let's configure Ubuntu to start Gogs automatically after booting:
sudo update-rc.d gogs defaults
sudo update-rc.d gogs enable
You can make sure this actually works by rebooting the system:
sudo rebootGogs should be accessible automatically after reboot completes.
HTTPS Encryption
I'd strongly advise against using Gogs without HTTPS encryption, as your credentials will then be exposed to eavesdroppers using a very simple man-in-the-middle attack whenever you connect via a public Wi-Fi hotspot.
Luckily, we can set up HTTPS for free using Let's Encrypt! All you need is a domain name.
Request a Let's Encrypt Certificate
Run the following commands to install certbot, a utility that makes it easy to request TLS certificates from Let's Encrypt:
sudo apt-get update
sudo apt-get install -y software-properties-common
sudo add-apt-repository ppa:certbot/certbot
sudo apt-get update
sudo apt-get install -y certbot
Then, request a certificate from Let's Encrypt by running the following command, modifying gogs.example.com to your own subdomain:
sudo certbot certonly --standalone -d gogs.example.com
Note: Your gogs.example.com subdomain DNS record should be pointing directly to your server's public IP address and your server needs to have incoming port 80 accessible from all IPs for the Let's Encrypt validation mechanism to work.
Answer all the questions asked by certbot (enter your e-mail address and accept the terms). Once complete, make sure that the certificates were successfully generated.
The public certificate and private key files have been saved to /etc/letsencrypt/live/your-subdomain/. Let's create symlinks to these files so that Gogs can access them by running these commands, replacing gogs.example.com with your own subdomain:
cd /home/git/gogs
sudo ln -s /etc/letsencrypt/live/gogs.example.com/fullchain.pem cert.pem
sudo ln -s /etc/letsencrypt/live/gogs.example.com/privkey.pem key.pem
And now, let's make sure Gogs can access the certificate and private key files by running the following command:
sudo chown -h git:git cert.pem key.pem
Last but not least, let's fix the permissions of the Let's Encrypt certificate directories:
sudo chmod 755 /etc/letsencrypt/live/
sudo chmod 755 /etc/letsencrypt/archive/
Configure Gogs for HTTPS
Run the following command to edit the Gogs app.ini config file:
sudo su git
nano /home/git/gogs/custom/conf/app.ini
Find:
[server]
Add below:
PROTOCOL = https
CERT_FILE = cert.pem
KEY_FILE = key.pem
Note: Make sure the protocol mentioned in ROOT_URL is https.
Save the file, log out of the git user (Ctrl + A + D) and restart Gogs:
sudo service gogs restart
Certificate Auto-Renewal
Let's Encrypt certificates are only valid for 90 days, but luckily, certbot comes with an auto-renewal script that is automatically installed to /etc/cron.d which takes care of this for us. You do need to make sure that incoming port 80 stays open for renewal to work, though.
You should now be able to access Gogs securely through encrypted HTTPS via the same hostname and port:
https://gogs.example.com:1337
That's it!
I'm serious this time. You've successfully set up a persistent, self-hosted, secure, and private Git service! Now get back to working on your personal projects!