Enabling Enhanced Networking for Ubuntu EC2 Instances
Nov 12, 2019
AWS has (quite a while ago) released EC2 instance families (such as c5, m5, and t3) that run a customized version of the Linux kernel, with some AWS goodies and performance improvements baked in, namely ena (Enhanced Networking) and nvme (Non-Volatile Memory).
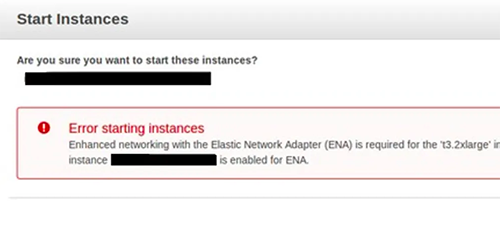
If you ever tried to change the instance type of your old Ubuntu instances to one of these new instance families, you were probably presented with an error that your instance does not support Enhanced Networking:
The AWS documentation seems to cover this topic quite well at first glance, but soon enough I noticed that there seems to be a fundamental mistake in the command mentioned in the docs for enabling ENA support:
sudo apt-get upgrade -y linux-aws # Don't run this
It seems the AWS team was under the impression that running this command would only update/install a single package called linux-aws. In fact, quite to the contrary, running sudo apt-get upgrade will upgrade every single installed package on your machine to its latest version. This could potentially break your server and application especailly if you aren't prepared for it. Plus, there isn't a reason to suggest updating all the packages if all we're wanting to do is add ENA support.
The reality is that it's possible to enable Enhanced Networking and nvme support on your old Ubuntu instance by simply installing the linux-aws package as follows:
sudo apt-get install linux-aws -y
Note: Please create a snapshot / AMI of your instance before running any of the commands on this page.
Then, modify the initramfs module list by running this command:
sudo nano /etc/initramfs-tools/modules
Add nvme to the bottom of this file and save.
Finally, run the following command to update the initramfs:
sudo update-initramfs -u -k all
Reboot your system for changes to take effect:
sudo reboot
If you'd like to check whether both ena and nvme are successfully installed and loaded, you can use the following AWS provided script:
wget https://gist.githubusercontent.com/eladnava/1249b10c9f90c144f0d6a0fe01d93066/raw/3a82db14b90273a0b6e024114fe3ce8c4d0e345f/c5_m5_checks_script.sh
chmod +x c5_m5_checks_script.sh
sudo ./c5_m5_checks_script.sh
Output should be identical to the following:
------------------------------------------------

OK     NVMe Module is installed and available on your instance


OK     ENA Module with version 2.0.3K is installed and available on your instance


OK     fstab file looks fine and does not contain any device names.

------------------------------------------------
If indeed the output is identical, you are now ready to shut down your instance and enable the ena-support flag using the aws-cli.
- Stop the instance in the AWS console
- Get the instance ID from the AWS console
- Plug it into the following command (replace
i-ABCDEFGwith your instance ID)
aws ec2 modify-instance-attribute --instance-id i-ABCDEFG --ena-support
If you have not yet installed/configured the aws-cli, please refer to these instructions.
Once this command executes without any error, you are now ready to modify your instance type to the desired ENA-enabled instance family, such as c5, m5 or t3, in the AWS EC2 console.
That's it! Hope I helped avoid a catastrophe and get your old-but-reliable instances running on a new instance family.