Deploy a Dynamic DNS Load Balancer with Node.js
Jul 31, 2020
There are several well-documented approaches to load balancing large amounts of traffic to your service. The most common involves using nginx or apache as a reverse-proxy to load-balance connections in a round-robin or least-concurrent-connections fashion.
Another common method is to use a load-balancing service such as AWS Elastic Load Balancer. Behind the scenes, AWS runs servers that accept connections from your clients and forward them to your own backend servers for processing. The AWS service tracks various metrics behind-the-scenes to decide which backend server to forward incoming requests to. Based on the docs, with Classic Load Balancers, the node that receives the request selects a registered instance as follows:
- It uses the round robin routing algorithm for TCP listeners
- It uses the least outstanding requests routing algorithm for HTTP and HTTPS listeners
While this approach to load-balancing can work seamlessly for generally short-lived connections such as HTTP requests, with long-lived TCP sockets, a round-robin routing algorithm may not balance traffic equally among your backend instances in some scenarios, such as when you spin up a new backend instance as you scale. In this scenario, it could take a while until the new instance is hosting the same number of long-lived TCP connections as the others, which may have already reached their connection limit.
Another drawback to using a service such as AWS ELB for load-balancing long-lived TCP connections is the added cost and compute power for routing these connections. With AWS ELB, each client connection is kept open as it is being load-balanced to your own backend servers for processing. Therefore, each client connection to your service essentially creates two connections: one at the ELB level, and one on your own servers. Furthermore, AWS ELB can become costly, as it also charges based on the
amount of data transferred through the load balancer to your backend instances.
Enter Dynamic DNS Load Balancing
Dynamic DNS load balancing can solve both these drawbacks, quite seamlessly. With traditional DNS mentality, we're used to defining a static host file which maps various records to static endpoints (IPs/hostnames/etc). But what if we could control the DNS resolver response on a per-request level? We could essentially load-balance traffic at the DNS level, routing each client to a backend instance based on our own criteria, such as routing to the server with the least number of established connections.
We face two obstacles:
1) Most DNS services (including AWS Route 53) don't support implementing your own routing logic, nor executing dynamic code before returning a DNS response.
2) Client machines and ISPs like to cache a DNS response for a given hostname, sometimes for longer than the TTL value on that DNS record.
Setting up a Dynamic DNS Server
The first obstacle is pretty easy to solve with Node.js -- it turns out there's plenty of DNS server implementations, which let you handle each client request individually, and return a dynamic, load-balanced response, instead of a fixed one.
Unfortunately, most of the Node.js packages I tested were either outdated or broken, returning invalid DNS responses (extra/missing bytes in the response) or not supporting the common record types, or error codes such as REFUSED or NXDOMAIN.
Finally, I came across mname which validated across most DNS server tests I performed and allowed for per-request response processing:
var named = require('mname');
var server = named.createServer();

// In production, run the server on TCP/UDP port 53\
// or use iptables to forward traffic
var port = 9000;

// Listen on TCP
server.listenTcp({ port: port, address: '::' });

// Listen on UDP
server.listen(port, '::', function() {
  console.log('DNS server started on TCP/UDP port ' + port);
});

server.on('query', function(query, done) {
  // Extract query hostname and set default TTL to 60 seconds
  var name = query.name(), ttl = 60;

  // Log incoming DNS query for debugging purposes
  console.log('[DNS] %s IN %s', query.name(), query.type());

  // Your backend IPs
  var serverIPs = ['1.2.3.4', '8.8.4.4', '8.8.8.8'];

  // Select one randomly (modify based on your own routing algorithm)
  var result = serverIPs[Math.floor(Math.random() * serverIPs.length)];

  // Load-balance DNS queries (A record) for "api.example.com"
  if (query.type() === 'A' && name.toLowerCase().endsWith('api.example.com')) {
     // Respond with load-balanced IP address
     query.addAnswer(name, new named.ARecord(result), ttl);
  }
  else {
    // NXDOMAIN response code (unsupported query name/type)
    query.setError('NXDOMAIN');
  }

  // Send response back to client
  server.send(query);
});
Run the sample code (after running npm install mname) and you have got yourself a dynamic DNS server running in Node.js.
Go ahead and test it out with dig:
dig @127.0.0.1 -p 9000 api.example.com
The result should look as follows:
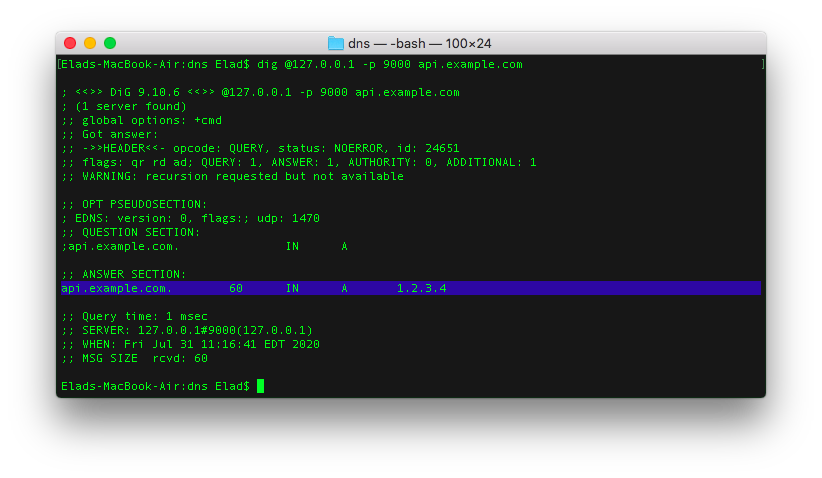
If you run the dig command multiple times, you'll notice a random result returned for every query.
Now, all you need to do is write custom code to return the IP address of one of your backend servers to handle the client's request/connection, based on your own load balancing logic.
For example, you might maintain a database table with each backend server and its current number of established connections. Your DNS server should regularly query this table and pick the endpoint that recently reported the least number of established connections.
Pro tip: It is super important to call
.toLowerCase()on the incomingquery.name()when validating it againstapi.example.com, as some DNS clients / ISPs like to use mixed case to query your DNS server for added DNS security, which meansapi.example.comcan becomeaPi.ExAmPLE.coM. But do make sure to return the mixed case query name back to the requesting client in your DNS response answer.
And just like that, you have implemented yourself a dynamic DNS load balancer. But how do we work around the unforgiving DNS caching issue performed by ISPs?
An Anti-cache Workaround
We know that multiple queries for the same hostname, api.example.com, may result in caching, thereby hindering our efforts to load-balance every single connection to our service. A clever way to work around this is by placing a random number, or the current Unix timestamp, as a prefix to our hostname:
1596207957-api.example.com
If clients try to connect to a new hostname every time they want to establish a connection, it would never have been cached previously, and therefore your DNS service can return an uncached, fresh response, every single time.
The sample code already supports this anti-cache mechanism using the .endsWith() function:
if (name.toLowerCase().endsWith('api.example.com')) {}
Now all that's left is to implement your routing algorithm and deploy this DNS service as a cluster. When deploying a DNS cluster, it is recommended to run 4 DNS servers with different IP addresses, each listening on TCP/UDP port 53 for incoming DNS requests, and assign each of them a hostname in another domain, such as ns1.example.io, ns2.example.io, and so on.
Refer to my Deploy Resilient Node.js Apps with Forever (skip the nginx part) to run your Node.js DNS server with forever, and refer to my Binding a Node.js App to Port 80 guide (specifically, the iptables section), tweaking the command to reroute traffic on incoming port 53 to your DNS server listening on port 9000:
sudo iptables -A PREROUTING -t nat -i eth0 -p tcp --dport 53 -j REDIRECT --to-port 9000
sudo iptables -A PREROUTING -t nat -i eth0 -p udp --dport 53 -j REDIRECT --to-port 9000
For your DNS servers to actually start routing queries, you need to set the target domain name's nameservers (such as as example.com) in the domain name control panel to those 4 servers' hostnames so that clients start querying your DNS servers when trying to resolve api.example.com.
Hope you found this useful, and let me know if you have any questions in the comments!