Backing Up Your Amazon S3 Buckets to EC2
Oct 1, 2015
Amazon S3 is a wonderful data storage service -- it's really easy to integrate with your application (via Amazon-provided SDKs) and the price is unbeatable -- $0.03 per GB. That's dirt cheap compared to other cloud file storage solutions. And AWS is one of the most trusted names in cloud technology today, in terms of security, stability, redundancy, scalability and reliability.
One drawback with Amazon S3 is the lack of automatic backups, and the fact that it's so easy to accidentally delete sensitive files with a simple coding mistake, or even worse, the entire S3 bucket with the click of a button.
Bucket Versioning
One solution is to use Amazon S3's Versioning feature, which basically keeps a revision of all files uploaded to your S3 bucket, even if they get deleted. However, deleting the entire bucket accidentally could render this feature useless, as the versioning history would be deleted along with it.
MFA Delete
Another option is to use MFA Delete to enforce "2-factor authentication" to delete files in your bucket, which will protect you if your Access Key ID & Secret Key get leaked (don't be that guy that pushes them to GitHub).
However, MFA Delete still doesn't prevent you from making a coding mistake and deleting them yourself. Also, if physical access to your server is obtained, the MFA key will be compromised, allowing an attacker to delete files in your bucket.
Sync Your S3 Bucket to an EC2 Server
In the end, I decided that the safest course of action is to periodically sync the S3 bucket to an EC2 server with enough storage. This can be easily achieved by utilizing multiple command line utilities that make it possible to sync a remote S3 bucket to the local filesystem.
s3cmd
At first, s3cmd looked extremely promising. However, after trying it on my enormous S3 bucket -- it failed to scale, erroring out with a Segmentation fault. It did work fine on small buckets, though. Since it did not work for huge buckets, I set out to find an alternative.
s4cmd
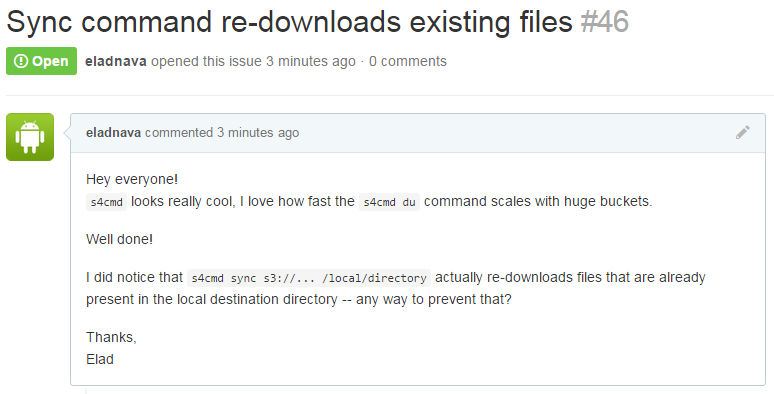
The newer, multi-threaded alternative to s3cmd. Looked even more promising, however, I noticed that it kept re-downloading files that were already present on the local filesystem. That is not the kind of behavior I was expecting from the sync command. It should check whether the remote file already exists locally (hash/filesize checking would be neat) and skip it in the next sync run on the same target directory. I opened an issue (bloomreach/s4cmd/#46) to report this strange behavior. In the meantime, I set out to find another alternative.
awscli
And then I found awscli. This is Amazon's official command line interface for interacting with their different cloud services, S3 included.
It provides a useful sync command that quickly and easily downloads the remote bucket files to your local filesystem.
aws s3 sync s3://your-bucket-name /home/ubuntu/s3/your-bucket-name/Benefits
- Scalable - supports huge S3 buckets
- Multi-threaded - syncs the files faster by utilizing multiple threads
- Smart - only syncs new or updated files
- Fast - thanks to its multi-threaded nature and smart sync algorithm
Accidental Deletion
Conveniently, the sync command won't delete files in the destination folder (local filesystem) if they are missing from the source (S3 bucket), and vice-versa. This is perfect for backing up S3 -- in case files get deleted from the bucket, re-syncing it will not delete them locally. And in case you delete a local file, it won't be deleted from the source bucket either.
Setting Up AWSCLI on Ubuntu 14.04 LTS
Let's begin by installing awscli. There are several ways to do this, however, I found it easiest to install it via apt-get.
sudo apt-get install awscliConfiguration
Next, we need to configure awscli with our Access Key ID & Secret Key, which you must obtain from IAM, by creating a user and attaching the AmazonS3ReadOnlyAccess policy. This will also prevent you or anyone who gains access to these credentials from deleting your S3 files. Make sure to enter your S3 region, such as us-east-1.
aws configure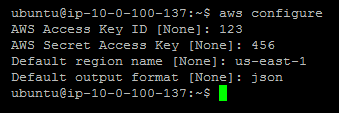
Preparation
Let's prepare the local S3 backup directory, preferably in /home/ubuntu/s3/{BUCKET_NAME}. Make sure to replace {BUCKET_NAME} with your actual bucket name.
mkdir -p /home/ubuntu/s3/{BUCKET_NAME}Initial Sync
Let's go ahead and sync the bucket for the first time with the following command:
aws s3 sync s3://{BUCKET_NAME} /home/ubuntu/s3/{BUCKET_NAME}/Assuming the bucket exists, the AWS credentials and region are correct, and the destination folder is valid, awscli will start to download the entire bucket to the local filesystem.
Depending on the size of the bucket and your Internet connection, it could take anywhere from a few seconds to hours. When that's done, we'll go ahead and set up an automatic cron job to keep the local copy of the bucket up to date.
Setting Up a Cron Job
Go ahead and create a sync.sh file in /home/ubuntu/s3:
nano /home/ubuntu/s3/sync.shCopy and paste the following code into sync.sh:
#!/bin/sh

# Echo the current date and time

echo '-----------------------------'
date
echo '-----------------------------'
echo ''

# Echo script initialization
echo 'Syncing remote S3 bucket...'

# Actually run the sync command (replace {BUCKET_NAME} with your S3 bucket name)
/usr/bin/aws s3 sync s3://{BUCKET_NAME} /home/ubuntu/s3/{BUCKET_NAME}/

# Echo script completion
echo 'Sync complete'
Make sure to replace {BUCKET_NAME} with your S3 bucket name, twice throughout the script.
Pro tip: You should use
/usr/bin/awsto link to theawsbinary, ascrontabexecutes commands in a limited shell environment and won't be able to find the executable on its own.
Next, make sure to chmod the script so it can be executed by crontab.
sudo chmod +x /home/ubuntu/s3/sync.shLet's try running the script to make sure it actually works:
/home/ubuntu/s3/sync.shThe output should be similar to this:
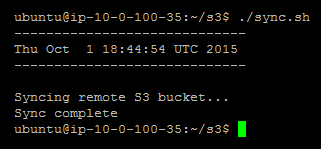
Next, let's edit the current user's crontab by executing the following command:
crontab -eIf this is your first time executing crontab -e, you'll need to select a preferred editor. I'd recommend selecting nano as it's the easiest for beginners to work with.
Sync Frequency
We need to tell crontab how often to run our script and where the script resides on the local filesystem by writing a command. The format for this command is as follows:
m h dom mon dow commandThe following command configures crontab to run the sync.sh script every hour (specified via the minute:0 and hour:* parameters) and to have it pipe the script's output to a sync.log file in our s3 directory:
0 * * * * /home/ubuntu/s3/sync.sh > /home/ubuntu/s3/sync.logYou should add this line to the bottom of the crontab file you are editing. Then, go ahead and save the file to disk by pressing Ctrl + W and then Enter. You can then exit nano by pressing Ctrl + X. crontab will now run the sync task every hour.
Pro tip: You can verify that the hourly cron job is being executed successfully by inspecting
/home/ubuntu/s3/sync.log, checking its contents for the execution date & time, and inspecting the logs to see which new files have been synced.
All set! Your S3 bucket will now get synced to your EC2 server every hour automatically, and you should be good to go. Do note that over time, as your S3 bucket gets bigger, you may have to increase your EC2 server's EBS volume size to accommodate new files. You can always increase your EBS volume size by following this guide.